Editor’s Note: This blog has been updated on June 06, 2017 as per the latest version of GTM and Android
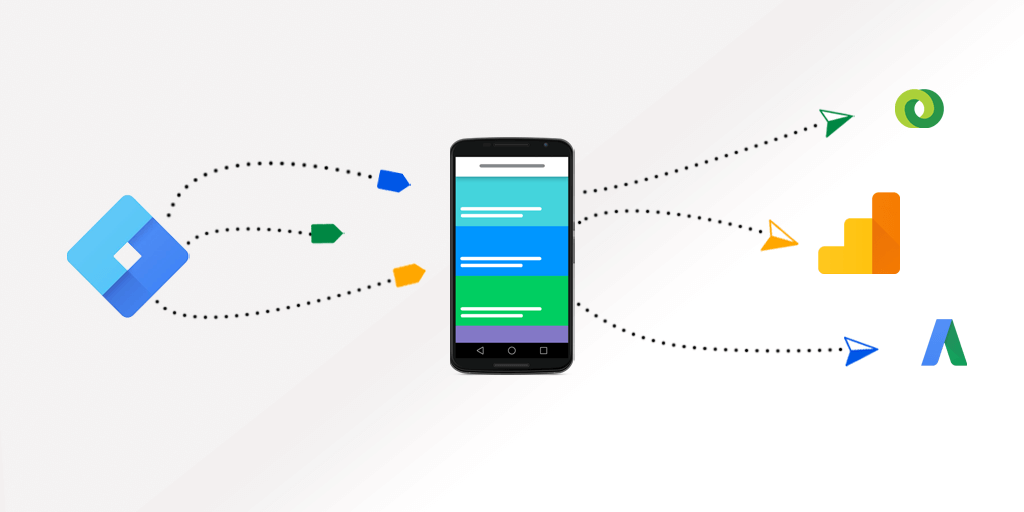
At I/O 2013, Google added new features to the Google Tag Manager. They launched Google Tag Manager for Android and iOS devices. It is used in Mobile App along with Google Analytics to track various user behavior and help the marketers identify the trends, needs of users, app performance and other peculiar insights.
Google Tag Manager for mobile app developer devices also makes their development easy and dynamic. It enables the developers to change configuration values in their mobile applications using the tag manager interface, without having to rebuild and resubmit application binaries to the app marketplaces.
In order to walk through the implementation, you must be familiar with Android and iOS development to understand and implement tags for web analytics using Google Tag Manager.
Before starting implementing GTM, I recommend drafting a plan for tagging for google tag manager it will help to structure the core objective of data collection.
Steps to set up GTM in an Android Project (Click here or iOS)
- Create a Google Tag Manager Account
- Create a Mobile App container
- Note down the Container ID (It would be of the form of GTM-XXXXX)
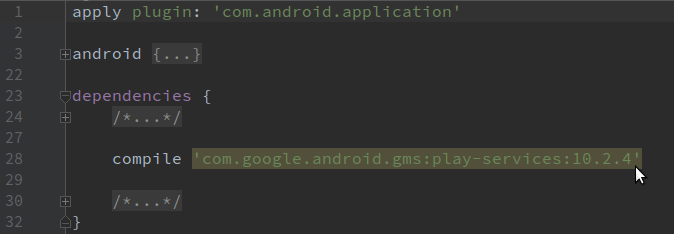
- Add Google Play Services library to your project
NOTE: Check for latest updated version of Google Play services library when adding it in project.
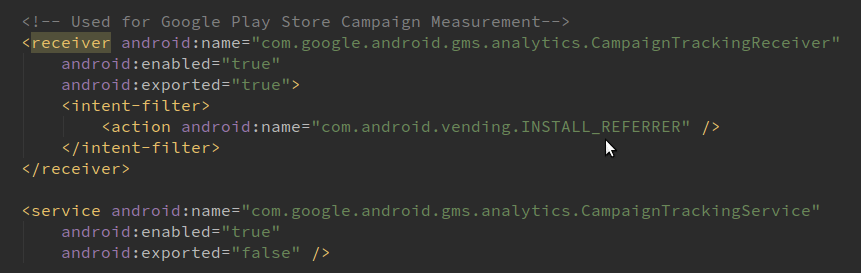
- Add the following permissions in your AndroidManifest.xml

- Also Add the Install Referrer Receiver in AndroidManifest.xml to track Campaign Data.

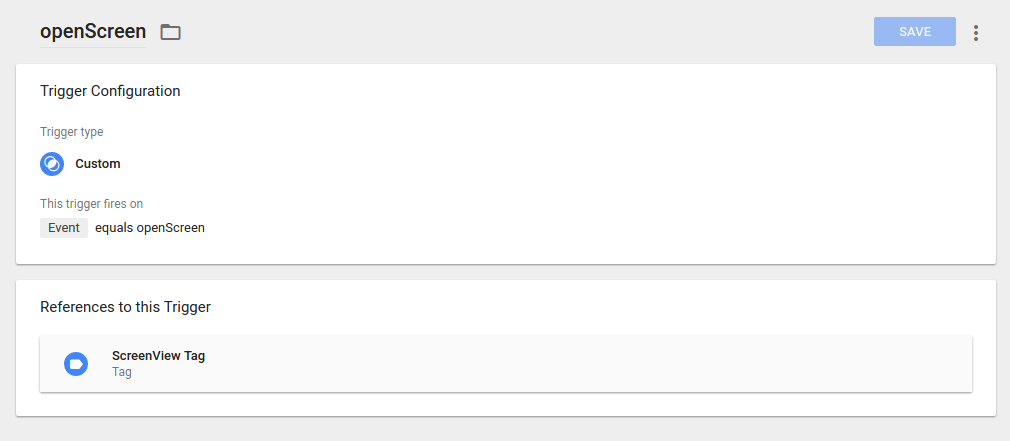
- Now, Create a Trigger with the following configuration in Google Tag Manager Container.

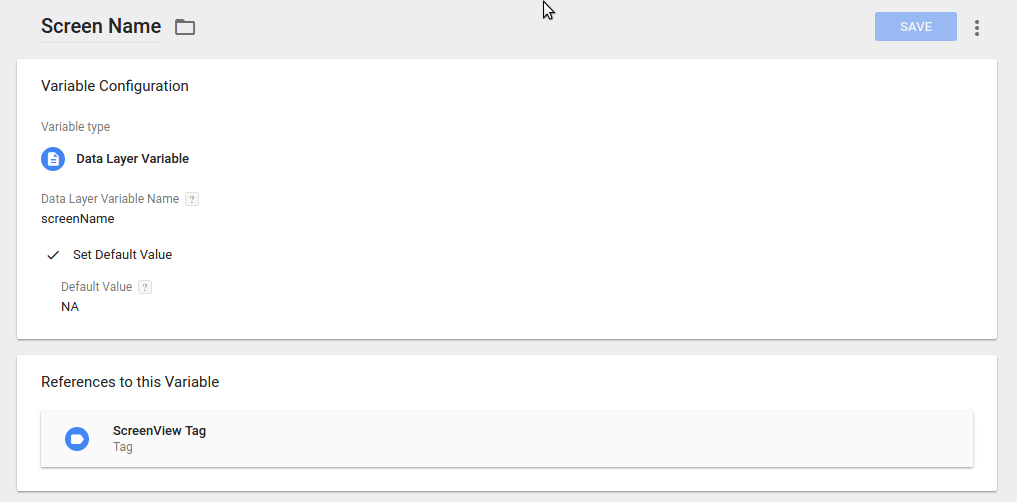
- Create a DataLayer Variable to fetch the value of screenName from the datalayer.

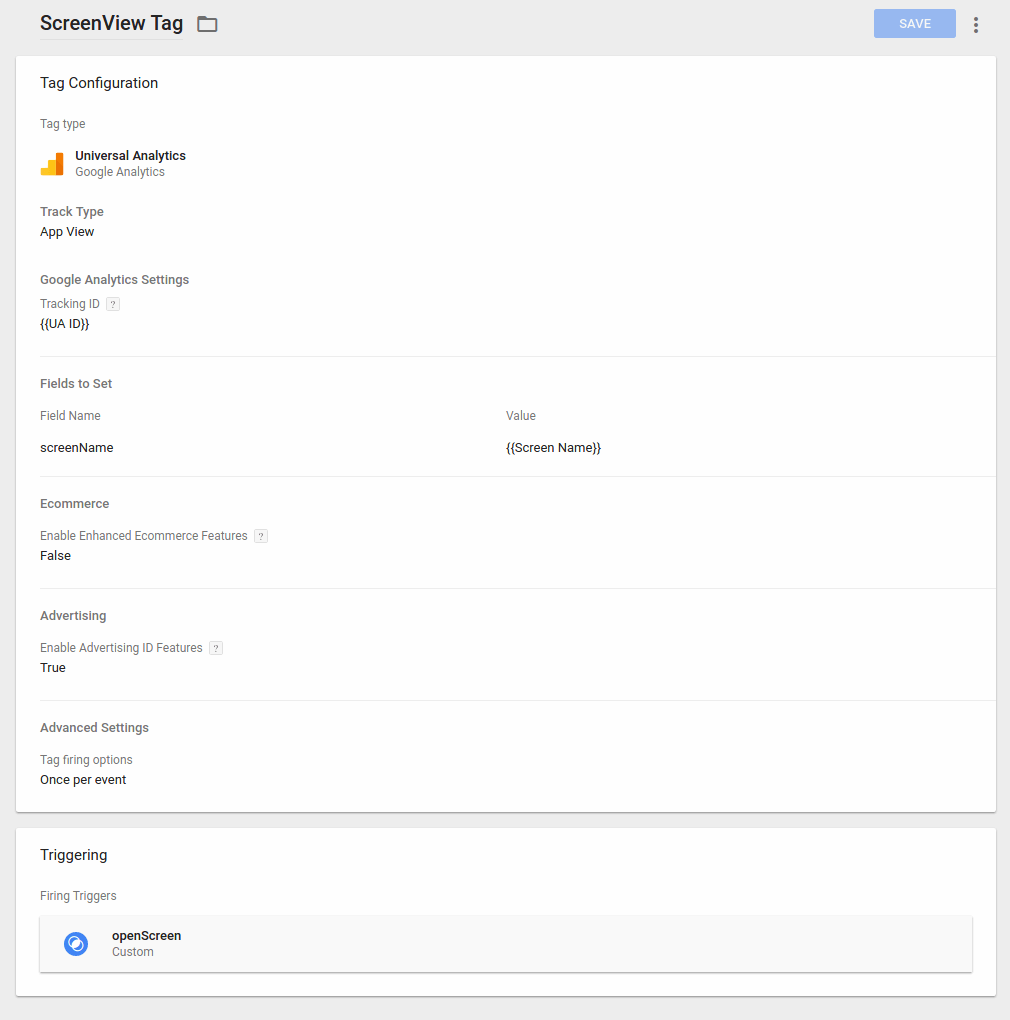
- Create a Tag to fire the Screen View from the app.

- Add Google Tag Manager’s Default Container to your Project.
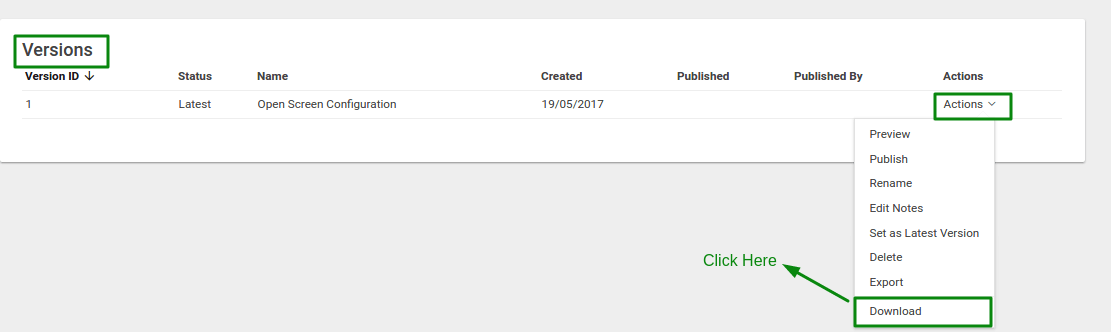
- Within Google Tag Manager interface select VERSIONS -> ACTION -> DOWNLOAD this will download the container binary file.

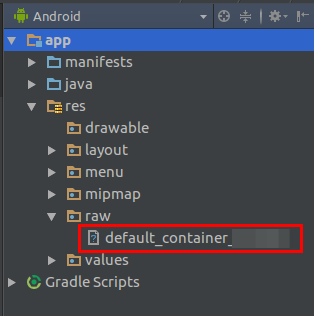
- Within your Android project, create a raw folder in project-root / res path.
- Copy the downloaded binary file to the path project-root / res / raw with changing the filename to gtm_defaultcontainer_gtm_id.

- Within Google Tag Manager interface select VERSIONS -> ACTION -> DOWNLOAD this will download the container binary file.

Now, Let’s get started with initializing Tag Manager Instance and using DataLayer
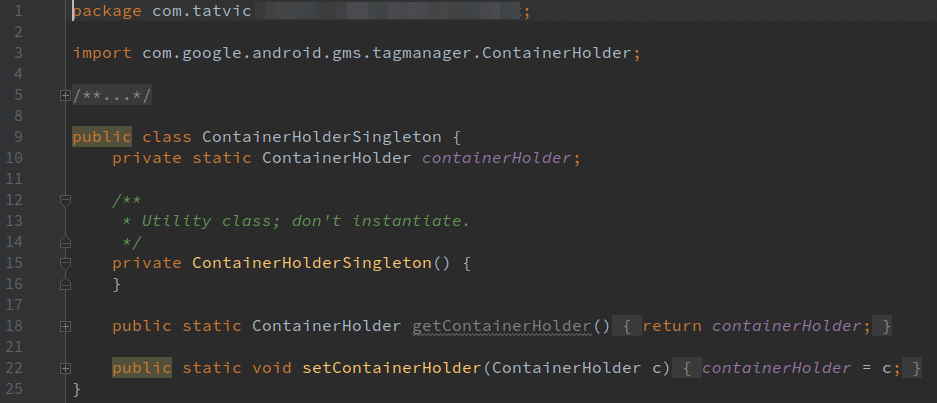
- Create a ContainerHolderSingleton Class.
ContainerHolderSingleton class is used to have access to a single instance of TagManager Object at a time.
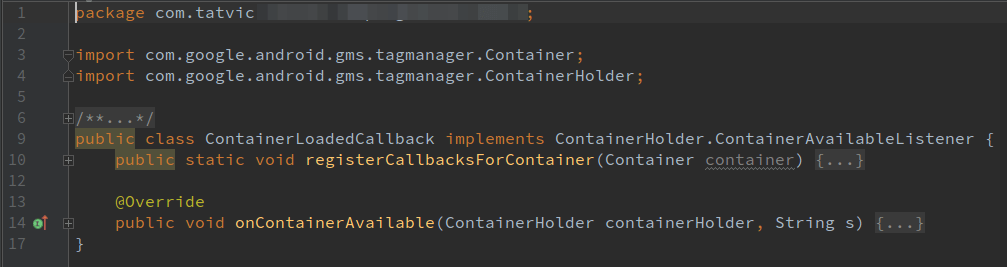
- Create a class ContainerLoadedCallback Class.
ContainerLoadedCallback class is used to load the fresh GTM Container when it is available
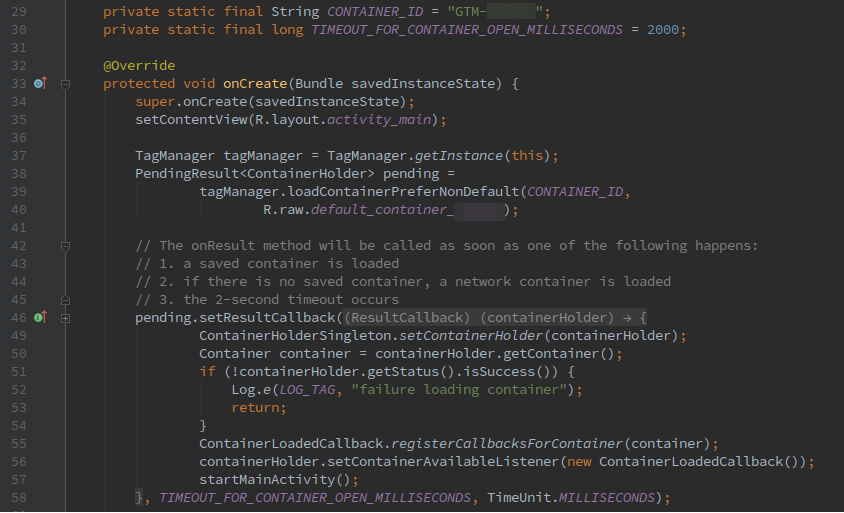
- Initialize Tag Manager in Application Class of your app (Recommended) or First Screen of the App (i.e. Splash Screen or Main Screen)
- Load the latest container by specifying the CONTAINER_ID
- Use ResultCallback to return the ContainerHolder once it has finished loading or has timed out for fetching the latest container

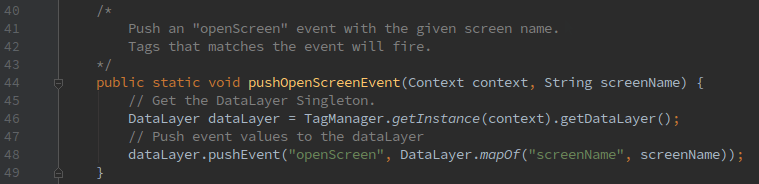
- After Initializing GTM well, it’s time to add the tracking code, which is implemented using the DataLayer Object.
DataLayer provides a layer of persistence that you use to store data in key-value pairs form and then send it to Google Analytics.
Create one method in general until class to push the openScreen event and start tracking the screen views from your app. You can call this method in onCreate()/onStart Method of your app activities with the screenName that you want to send.

With the above steps performed we have successfully implemented the Google Tag Manager in Android. To know that your implementation is working well, verify your data in Google Analytics Report.
Also please note that to track any kind of action through GTM, an event must be pushed in dataLayer and for the very same event, a Tag must be configured in GTM Interface.
So, that’s it. This is how you can integrate Google Tag Manager version 4 container in your Android app. Recently, Google rolled out version 5 container for the app
Now, the question is which version should you use in your app. Stay tuned for the benefits of the version 5 container over the version 4 container and steps to integrate it.
Till then HAPPY TAGGING!