
With ever increasing volume of data, it is impossible to tell stories without visualizations. Data visualization is an art of how to turn numbers into useful knowledge.
R Programming lets you learn this art by offering a set of inbuilt functions and libraries to build visualizations and present data. Before the technical implementations of the visualization, let’s see first how to select the right chart type.
Selecting the Right Chart Type
There are four basic presentation types:
- Comparison
- Composition
- Distribution
- Relationship
To determine which amongst these is best suited for your data, I suggest you should answer a few questions like,
- How many variables do you want to show in a single chart?
- How many data points will you display for each variable?
- Will you display values over a period of time, or among items or groups?
Below is a great explanation on selecting a right chart type by Dr. Andrew Abela.

In your day-to-day activities, you’ll come across the below listed 7 charts most of the time.
- Scatter Plot
- Histogram
- Bar & Stack Bar Chart
- Box Plot
- Area Chart
- HeatMap
- Correlogram
We’ll use ‘Big Mart data’ example as shown below to understand how to create visualizations in R. You can download the full dataset from here.

Now let’s see how to use these visualizations in R
1. Scatter Plot
When to use: Scatter Plot is used to see the relationship between two continuous variables.
In our above mart dataset, if we want to visualize the items as per their cost data, then we can use scatter plot chart using two continuous variables, namely Item_Visibility & Item_MRP as shown below.

Here is the R code for simple scatter plot using function ggplot() with geom_point().
library(ggplot2)          // ggplot2 is an R library for visualizations train.
ggplot(train, aes(Item_Visibility, Item_MRP)) + geom_point() + scale_x_continuous("Item Visibility", breaks = seq(0,0.35,0.05))+ scale_y_continuous("Item MRP", breaks = seq(0,270,by = 30))+ theme_bw()
Now, we can view a third variable also in same chart, say a categorical variable (Item_Type) which will give the characteristic (item_type) of each data set. Different categories are depicted by way of different color for item_type in below chart.

R code with an addition of category:
ggplot(train, aes(Item_Visibility, Item_MRP)) + geom_point(aes(color = Item_Type)) +
  scale_x_continuous("Item Visibility", breaks = seq(0,0.35,0.05))+
  scale_y_continuous("Item MRP", breaks = seq(0,270,by = 30))+
  theme_bw() + labs(title="Scatterplot")
We can even make it more visually clear by creating separate scatter plots for each separate Item_Type as shown below.

R code for separate category wise chart:
ggplot(train, aes(Item_Visibility, Item_MRP)) + geom_point(aes(color = Item_Type)) +
  scale_x_continuous("Item Visibility", breaks = seq(0,0.35,0.05))+
  scale_y_continuous("Item MRP", breaks = seq(0,270,by = 30))+
  theme_bw() + labs(title="Scatterplot") + facet_wrap( ~ Item_Type)
Here, facet_wrap works superb & wraps Item_Type in rectangular layout.
2. Histogram
When to use: Histogram is used to plot continuous variable. It breaks the data into bins and shows frequency distribution of these bins. We can always change the bin size and see the effect it has on visualization.
From our mart dataset, if we want to know the count of items on basis of their cost, then we can plot histogram using continuous variable Item_MRP as shown below.

Here is the R code for simple histogram plot using function ggplot() with geom_histogram().
ggplot(train, aes(Item_MRP)) + geom_histogram(binwidth = 2)+
  scale_x_continuous("Item MRP", breaks = seq(0,270,by = 30))+
  scale_y_continuous("Count", breaks = seq(0,200,by = 20))+
  labs(title = "Histogram")
3. Bar & Stack Bar Chart
When to use: Bar charts are recommended when you want to plot a categorical variable or a combination of continuous and categorical variable.
From our dataset, if we want to know number of marts established in particular year, then bar chart would be most suitable option, use variable Establishment Year as shown below.

Here is the R code for simple bar plot using function ggplot() for a single continuous variable.
ggplot(train, aes(Outlet_Establishment_Year)) + geom_bar(fill = "red")+theme_bw()+
  scale_x_continuous("Establishment Year", breaks = seq(1985,2010)) +
  scale_y_continuous("Count", breaks = seq(0,1500,150)) +
  coord_flip()+ labs(title = "Bar Chart") + theme_gray()
Vertical Bar Chart:
As a variation, you can remove coord_flip() parameter to get the above bar chart vertically.

To know item weights (continuous variable) on basis of Outlet Type (categorical variable) on single bar chart, use following code:
ggplot(train, aes(Item_Type, Item_Weight)) + geom_bar(stat = "identity", fill = "darkblue") + scale_x_discrete("Outlet Type")+ scale_y_continuous("Item Weight", breaks = seq(0,15000, by = 500))+ theme(axis.text.x = element_text(angle = 90, vjust = 0.5)) + labs(title = "Bar Chart")
Stacked Bar chart:
Stacked bar chart is an advanced version of bar chart, used for visualizing a combination of categorical variables.
From our dataset, if we want to know the count of outlets on basis of categorical variables like its type (Outlet Type) and location (Outlet Location Type) both, stack chart will visualize the scenario in most useful manner.

Here is the R code for simple stacked bar chart using function ggplot().
ggplot(train, aes(Outlet_Location_Type, fill = Outlet_Type)) + geom_bar()+
labs(title = "Stacked Bar Chart", x = "Outlet Location Type", y = "Count of Outlets")
4. Box Plot
When to use: Box Plots are used to plot a combination of categorical and continuous variables. This plot is useful for visualizing the spread of the data and detect outliers. It shows five statistically significant numbers- the minimum, the 25th percentile, the median, the 75th percentile and the maximum.
From our dataset, if we want to identify each outlet’s detailed item sales including minimum, maximum & median numbers, box plot can be helpful. In addition, it also gives values of outliers of item sales for each outlet as shown in below chart.

The black points are outliers. Outlier detection and removal is an essential step of successful data exploration.
Here is the R code for simple box plot using function ggplot() with geom_boxplot.
ggplot(train, aes(Outlet_Identifier, Item_Outlet_Sales)) + geom_boxplot(fill = "red")+
scale_y_continuous("Item Outlet Sales", breaks= seq(0,15000, by=500))+
labs(title = "Box Plot", x = "Outlet Identifier")
5. Area Chart
When to use: Area chart is used to show continuity across a variable or data set. It is very much same as line chart and is commonly used for time series plots. Alternatively, it is also used to plot continuous variables and analyze the underlying trends.
From our dataset, when we want to analyze the trend of item outlet sales, area chart can be plotted as shown below. It shows count of outlets on basis of sales.

Here is the R code for simple area chart showing continuity of Item Outlet Sales using function ggplot() with geom_area.
ggplot(train, aes(Item_Outlet_Sales)) + geom_area(stat = "bin", bins = 30, fill = "steelblue") + scale_x_continuous(breaks = seq(0,11000,1000))+ labs(title = "Area Chart", x = "Item Outlet Sales", y = "Count")
6. Heat Map
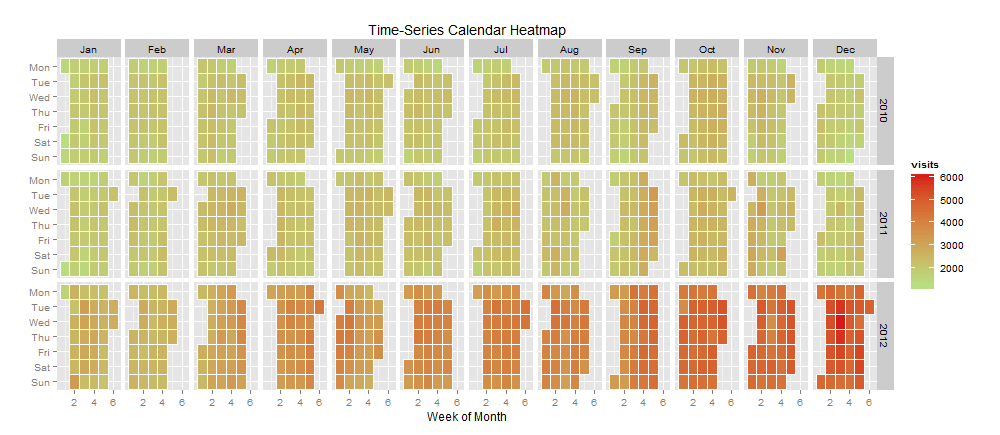
When to use: Heatmap uses intensity (density) of colors to display relationship between two or three or many variables in a two dimensional image. Heatmap Analysis for website allows you to explore two dimensions as the axis and the third dimension by intensity of color.
From our dataset, if we want to know cost of each item on every outlet, we can plot heatmap as shown below using three variables Item MRP, Outlet Identifier & Item Type from our mart dataset.

The dark portion indicates Item MRP is close 50. The brighter portion indicates Item MRP is close to 250.
Here is the R code for simple heat map using function ggplot().
 ggplot(train, aes(Outlet_Identifier, Item_Type))+
  geom_raster(aes(fill = Item_MRP))+
  labs(title ="Heat Map", x = "Outlet Identifier", y = "Item Type")+
  scale_fill_continuous(name = "Item MRP")
7. Correlogram
When to use: Correlogram is used to test the level of co-relation among the variable available in the data set. The cells of the matrix can be shaded or colored to show the co-relation value.
Darker the color, higher the co-relation between variables. Positive co-relations are displayed in blue and negative correlations in red color. Color intensity is proportional to the co-relation value.
From our dataset, let’s check co-relation between Item cost, weight, visibility along with Outlet establishment year and Outlet sales from below plot.
In our example, we can see that Item cost & Outlet sales are positively correlated while Item weight & its visibility are negatively correlated.

Here is the R code for simple correlogram using function corrgram().
install.packages("corrgram")
library(corrgram)

corrgram(train, order=NULL, panel=panel.shade, text.panel=panel.txt,
           main="Correlogram")
Now I guess it should be easy for you to visualize the data using ggplot2 library in R Programming.
Apart from visualizations, you can learn more about data mining and the process to Combine Data from Analytics into R.
To know more or for any assistance on R programming, please drop us a comment with your details & we will be glad to assist you!!